Pages

Showing posts with label FPP. Show all posts

Tuesday, 11 July 2017

Stitch Gathering 2017 Tickets - Quilted Postcards!!


It's that time of year again, when the secret Stitch Gathering Ticket project I have been working on is finally revealed!

This will be our fifth event in October, so that means I have had to come up with FIVE different ideas for this so far - phew! Talk about making a rod for your own back (which is quite a violent metaphor now I think about it...)!


This year we are asking all our Retreaters to make a QUILTED POSTCARD, and then to swap it at the event with a secret partner (partner's info going out next week!).

And to help you out with this very creative project we have designed and printed some exclusive (and rather cute IMHO!) fabric stamps!!!


Drawing these little stamps was such fun! I started off with a bear king and a cat queen (because stamps often feature the head of state and in my Stitch Gathering world these would obviously be bears and cats!). And then I drew a little landscape and some buttons and a patchwork Dresden plate.

Scanning my Sewing Room for inspiration I spied some of Aurifil thread so I included those too. Then I was starting to run out of ideas so I decided to feature parts of the four quilts that have been used as our 'quilt of the year' on our Stitch Gathering branding.


Then Jonathan got involved and offered some of his Tiny House designs! We also had a myBearpaw flower logo but part of that got cut off by the printing.

We got Spoonflower to print this for us, as they did with our Stitch Gathering Text fabric last year. Such a great service and with cheaper and quicker postage now, as they have a factory in Germany!

From last Friday the stamps and instruction letters started to arrive with our Retreaters and by now most of them should be there so I can spill the beans. Everyone received a random selection of three stamps.


As in previous years this blog post will cover some initial ideas for making your ticket project. Of course I expect our Retreaters to totally out do any ideas I have, as they do every year!


I started with a little bit of improv. I had a leftover block from a recent quilt I made with Kaffe Fassett (I can share this next month!). I sliced this up and inserted some strips and generally mucked it up a little!

Then I added some yellow 'teasel heads', just lightly gluing them on. I drew around them to finish the teasel effect. It is based on this zippy pouch which had hand embroidered teasels over improv.


Then I had a try at free-motion embroidery! I've not really done this much before (I did some numbers once for an advent quilt), but I think all the FMQ I  have done made it an easy start. Quite pleased with how this looks, though maybe I should have made the stems more prominent.


I think the back maybe looks more interesting!

I finished this first postcard by sewing a back on, pillowcase style, with RST, leaving a gap and turning inside out. I added some random straight line quilting including around the outside, close to the edge, to close the gap.


I then needle-turn appliqued a couple of my stamps to the back.


Then I moved on to some FPP.

I was trying to find a pattern that needed a 100% or 200% enlargement, which I would then ignore and just make a mini version of. I think this could work really well if you have a pattern like this already, perhaps in a book?

But after trawling through some back issues of Love Patchwork and Quilting I found these arrows as past of a Lynne Goldsworthy BOM block. The pattern was 'actual size' in the magazine and I realised that three of them would work perfectly. And I've always loved Lynne's arrows!


So I chose a little ombre range of fabrics in three of my favourite colours, along with a low-volume background, and off I went! After a some decision making I opted for the layout above.


For the back I found some printed instructions from a fabric Noah's Ark that I must have been hoarding for around 25 years! I used the machine to applique the stamps with a zig-zag stitch. This time I 'layered-up' as if it was a real quilt and used a little 505 to hold it while I added a half inch grid.


The lines are quilted with Aurifil 80wt.

I then added a thin single-fold binding (see my tutorial for this here) in a charcoal fabric.

Next up was a little more improv, this time straight out of the scrap bag, along with a little fussy cutting.


I brought back some of the Rifle Paper Alice in Wonderland fabric by Cotton and Steel from QuiltCon and I haven't used it yet. So I took a little Cheshire cat from it and framed it in red. I even included a little selvedge!


I then finished this the same way as the first postcard before tackling my usual matchstick quilting with variegated pink Aurifil and added hand quilting in perle cotton. Somehow the quilting has made that cat look a little sinister!

I needle turn appliqued a couple more stamps. to the back.


So here are the finished quilted postacrds!

And here are the backs. I used some printed quilt labels for the first and last ones. The hand quilting on that last one has appeared as lines ready for a message!

The idea is to write a message to your swap partner but I will keep these blank for now and they can be used as spares if necessary. They are all around 5 x 7in which is the maximum size we have asked for (anything between 4 x 6in and 5 x 7in).

I also asked that they be landscape in orientation, though having made a few now, I really don't think that matters too much, so knock yourselves out retreaters!


So far the feedback from Retreaters has been very positive, and they seem to be relishing this new creative challenge - hooray!

Everyone's finished tickets will be handed in at registration on the day of the event (to gain access obviously!), and then during the morning classes, my wonderful helpers will display them in the large conference room where we have our lunch so that they can all be viewed (like a mini exhibition!). Towards the end of lunch everyone will be asked to SWAP! They will then grab their postcard and go off to find their secret partners!

So watch out on social media for these little works of art appearing. I can't wait to see what everyone does!

Tuesday, 28 March 2017

Improv Paper Piecing - a review and a new project


I was recently sent a copy of Amy Friend's new book Improv Paper Piecing to review. I had loved Amy's last book, Intentional Piecing, so Iwas very happy to do this, and I was also interested and intrigued by the subject matter.


Long time readers will know that I love a bit of what I call 'freehand foundation piecing', where you draw on to a foundation like sew-in interfacing. I have a tutorial for this method here. But I have mainly used this technique to produce improv versions of complex curved blocks like Pickle Dish and New York Beauty.


But I had never tried, or even thought of, improv paper piecing. In her book Amy takes a technique that often appeals to the more OCD perfectionists amongst us and encourages us to use it for really creative, original designs.


Above are a couple of projects from the book (just a small example of the many really gorgeous, stunning quilts!) and you can see how modern and graphic they are, with a fluidity and looseness that you don't usually get with FPP. It's kind of an orgainised rendomness!


Below and above are two of Amy's quilts, made using this same method, and hung at QuiltCon this year. I really loved them both, the one above is called Aboreal and the one below Shibori.


Amy explains how to do everything with pencil and paper in the book but I know she also uses EQ7 to produce her designs. I have had this software for about 18 months and though I do use it I know I am not making full advantage of it.  However while at QuiltCon last month I took an EQ7 class with Christa Watson and now feel so much more confident with it!

So I thought I would follow Amy's method and try my hand at some improv paper piecing AND use my new found EQ7 knowledge to design a block.

This is what I came up with. The inspiration was a 'compass block' in an old quilt with a bit of 'Storm at Sea' thrown in. Each of these blocks is the same, I have just rotated to them.


And to be a bit more modern with my layout I have taken some blocks out to give the quilt plenty of negative space and make it 'off grid'. What do you think? Would you prefer it with all the blocks showing? EQ7 is great for playing around with designs. Read on to find out how you could WIN a copy!


I decided to trial a couple of 6in blocks to see what I thought before comitting to anything larger.

With FPP blocks EQ7 can suggest section and numbering. Usually I overide this but I thought I would try it's suggestion this time. However it involved some (albeit gentle) Y-seams, which are not my forte, so you can see it ended up a little puckered.

So for the second block I sectioned it a different way and I much prefer the results, even if it does require a lot more seams.


So now to decide what to do! Carry on making more little blocks and turn it in to a wall hanging? Or scale up for a full sized quilt? Or just add these to my growing orphan block pile? ;)


Meanwhile I can thoroughly recommend Amy's book. It is so nice to have something a little different ot get your teeth into! You can read more about Amy at her blog During Quiet Time. 

And if you fancy your chances you can enter a giveaway to win a copy of EQ7. Giveaway ends April 17th!

Friday, 6 January 2017

Pickle Dish Quilt


Happy New Year everyone! Let's start 2017 with a brand new quilt!

This is yet another pickle dish quilt, this time a straight-up version of the traditional pattern, made completely in Jennifer Paganelli's new line Hotel Frederiksted (for Free Spirit Fabrics).


Yay! It made the cover of Today's Quilter! I actually received my copy before Christmas but have been waiting till the official publication day to post about it.


This is the third quilt I have made with Jennifer's fabric and the pressure was on to do something spectacular. The quilt I made with her previous line was this New York Beauty, probably one of my most popular quilts ever!


So I really couldn't just rattle something off (not that I ever do!).

I knew when I suggested doing a pickle dish that I would regret it once I started endlessly piecing those spiky curves, but somehow that didn't stop me! I've always wanted to make one and what better fabric to use.

The editor didn't even know what it was, she just said yes after hearing the name! As she said in the magazine "you had me at 'pickle dish'!" 😁


The whole collection is wonderfully bright and fresh, a perfect tonic to this dark, grey time of year (in Scotland). I used the fabrics in a similar way to the New York Beauty, choosing white for all the spikes and used the red patterned fabrics for the background. The 'lemon' shapes were great for showing off the larger scale flowers and birds in the fabric.


It's quilted with a pale green variegated shade of Aurifil 50 and a sort of flame design, which worked so well that I've used a version of it since on my Starlights quilt. I am sure I will use it again soon.


The backing is Spot On by Robert Kaufman in Pomegranite.

Today's Quilter did their usual lovely styling. 


The fabric really makes this quilt, so exuberant and pretty! 

Unfortunately I have not managed to order it for the shop (though the rep is coming to see me next week so there's still time!), however UK peeps can order it from the wonderful Sugar Bowl Crafts.


Having made a traditional, an improv and a subverted version of this design in the last year I think I may have done enough Pickle Dishes for a while! 

But then again, you never know...

Friday, 5 August 2016

Potholder Swap!


This year's Stitch Gathering swap item is a pot holder!

I am just starting to allocate partners for both of this year's swaps (we are also hosting a nametag swap as we do every year) so I thought an inspiration post for pot holders would be a good idea.


So I thought I should have a go at making one myself.

It's basically just a mini mini quilt (which are apparently quite 'in' at the moment!) with a loop for a handle. I decided to try quite a complex foundation paper pieced block (because I'm a bit of an over achiever, in case you haven't noticed by now!) so I looked through some old Love Patchwork and Quilting magazines and found this very attractive 'stardust' block from one of Lynne's many BOMs.

The templates needed enlarging 200% which would make a 16 inch block. I just copied them as they were so that I would get an 8 inch block. You can see the size of the templates in the photo above. They look scary, right?!


I'm not a massive FPP fan but it was just one block, and with a lot of encouragement from the folks on instagram I pieced all these weird little shapes and after a few hours (and some y-seams!) I got this rather lovely block...


It's not supposed to be on point but I think it works better. I used fabric from my Farmer's Wife stash to make it.

Then I remembered that I needed insulated wadding to make a pot holder (something called Insul Bright). But luckily my LQS, Purely Patchwork in Linlithgow, stocks it! For those of you from further afield you can also get it from Empress Mills.


I used a piece of normal wadding too and quilted the 4 layers. I love how this looks on the back!

I then bound it with straight binding (to keep the points in the block I needed to mitre corners and therefore bias binding would not have been helpful).


I'm thoroughly delighted with my cute little pot holder! It's way too nice to use!

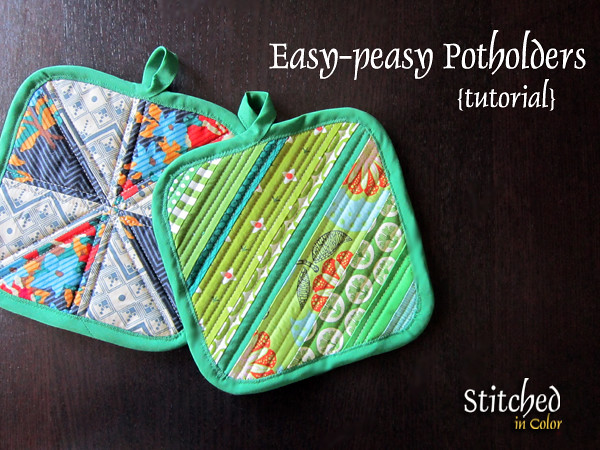
Here are some useful tutorials for pot holders I've found:


There's plenty more inspiration out there, try googling patchwork potholders or quilted potholders. 


And lastly one of our Stitch Gatherers, Gillian, was first off the block with this lovely star version she's already made and shared with me! I wonder which lucky swapper will get to keep this?!

Even if you are not coming to this year's event I hope you have found this potholder round up useful!