Pages

Showing posts with label swaps. Show all posts

Friday, 5 August 2016

Potholder Swap!


This year's Stitch Gathering swap item is a pot holder!

I am just starting to allocate partners for both of this year's swaps (we are also hosting a nametag swap as we do every year) so I thought an inspiration post for pot holders would be a good idea.


So I thought I should have a go at making one myself.

It's basically just a mini mini quilt (which are apparently quite 'in' at the moment!) with a loop for a handle. I decided to try quite a complex foundation paper pieced block (because I'm a bit of an over achiever, in case you haven't noticed by now!) so I looked through some old Love Patchwork and Quilting magazines and found this very attractive 'stardust' block from one of Lynne's many BOMs.

The templates needed enlarging 200% which would make a 16 inch block. I just copied them as they were so that I would get an 8 inch block. You can see the size of the templates in the photo above. They look scary, right?!


I'm not a massive FPP fan but it was just one block, and with a lot of encouragement from the folks on instagram I pieced all these weird little shapes and after a few hours (and some y-seams!) I got this rather lovely block...


It's not supposed to be on point but I think it works better. I used fabric from my Farmer's Wife stash to make it.

Then I remembered that I needed insulated wadding to make a pot holder (something called Insul Bright). But luckily my LQS, Purely Patchwork in Linlithgow, stocks it! For those of you from further afield you can also get it from Empress Mills.


I used a piece of normal wadding too and quilted the 4 layers. I love how this looks on the back!

I then bound it with straight binding (to keep the points in the block I needed to mitre corners and therefore bias binding would not have been helpful).


I'm thoroughly delighted with my cute little pot holder! It's way too nice to use!

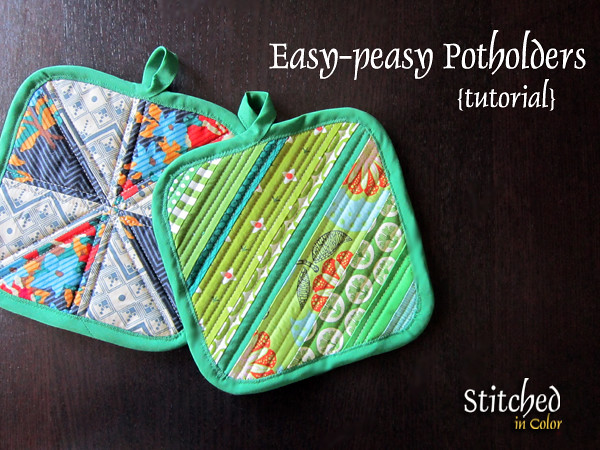
Here are some useful tutorials for pot holders I've found:


There's plenty more inspiration out there, try googling patchwork potholders or quilted potholders. 


And lastly one of our Stitch Gatherers, Gillian, was first off the block with this lovely star version she's already made and shared with me! I wonder which lucky swapper will get to keep this?!

Even if you are not coming to this year's event I hope you have found this potholder round up useful!

Thursday, 7 January 2016

Modern Applique Garland


How lovely do these photos look taken in the Autumn sunshine! Meanwhile in the present depths of our Scottish Winter I have forgotten what the sun looks like! It has been grey, wet and miserable for so long now and with no hope of a reprieve in the near future *sigh*.

So I am firmly indoors and having a massive clear out of my sewing room and bedroom (I have filled 12 bin bags already and I haven't finished yet! Don't worry everything is being distributed and recycled responsibly).

But I have broken off the surprisingly hard work to catch up on some blog posts.


Here is a little mini quilt I made for a swap between our Edinburgh Modern Quilt Guild and Melbourne Modern Quilt Guild. This was the first group swap we had partaken in. We were paired up with partners who would also make for us, so not secret partners, and therefore couldn't share anything until after they'd received their mini.


I was paired up with lovely Kim who is Simpson and Scarlett on IG. Kim asked for mustard yellow, red and orange and also that she liked mid-century modern. Well I have to admit that though I have heard this term a lot I had never really been able to recognise it easily in an aesthetic way. So I turned to google images and found a textile pattern that I thought would work really well as a patchwork block.

I made four blocks and sewed them together and was delighted with the effect. So much so that I decided to submit the design to the MQG for the QuiltCon magazine (published by Modern Patchwork). And amazingly they selected it!! But with a very tight deadline, which meant I needed those original four blocks for the quilt, and I then needed to keep schtum about it so couldn't have sent it to Kim anyway. So...


This meant I needed a new mini for Kim pronto as that deadline was looming too! I looked back through some recent pieces and found this large applique block I had made in the summer when I was in a 'use everything up' mood. Those leaves are all made from the scraps that the Sizzix Drunkard's Path die leaves behind, and I had saved them from my Squaring the Circle Quilt knowing they would make perfect applique leaves.


But I needed to adapt it to Kim's taste, so I unpicked the pink leaves and changed them to orange, then added the red and mustard circles in the centre. I then added as much hand quilting as I had time for, to try and make up for the slightly second-hand feel of the mini.

Thankfully Kim seems to genuinely love it! And look at the beautiful mini quilt she made for me!


Gorgeous fabrics in two of my fav colours, hand stitching, Bearpaws, and a little 'code' around the border! Those HSTs actually spell Jo Avery in patchwork language (is in higher and lower case letters), isn't that cute!! Thank you so much Kim!

Everyone in our guild loved the quilts they received, I am sure we will be swapping more with other MQG groups in the future. You can see all the other quilts in a couple of posts on our blog.


I do love the way the mini looks against our sun drenched barn door. One last look and then back to dark January and my chaotic sewing room!

Thursday, 9 April 2015

UKminiswap quilt


Somehow I found myself signing up for another Instagram swap! I think it was late last year and of course the April deadline seemed so far away at the time...


This is the UKminiswap organised by Nina and to be honest I was very attracted by the reduced postal rates involved in having a partner in the same country as me.


I hadn't really though much about what I would make but then I started a Cathedral window sample during my last workshop back in January and put a photo of it on Instagram suggesting it could be for my partner. When I saw that she liked it I decide to go with it!


But then I was too busy to do anything with it until the last week, when I finally had a bit of a break.

This is a bit of an experiment with CW as usually I make my background all the same fabric. I did try different fabric backgrounds once before but I made them similar colours so that there wasn't such a contrast.


This has a real checkerboard of low and high volume fabrics, which you can see better from the back (and also you can see my mistake missing a dark square out!).


I used the machine to sew the rainbow windows down (so you get a nice pattern on the back) and then added some hand quilting in different coloured perles.


For an extra my partner will get one of these Japanese Origami bags made from a beautiful new organic fabric line from Windham called Forest Parade. I'll fill it with some goodies too. But I have plenty of time for this as I actually finished way ahead of the deadline for once!


I do like the way the dark 'flowers' between the windows pop out in this piece, it looks very different from my other Cathedral Windows.


And obviously I hope my partner likes it too!

If you are interested in  learning how to make Cathedral windows with me then check out the workshop I am teaching at Simply Solids on June 13th.

Tuesday, 17 February 2015

QuiltCon Prep with The Makers!


So I think you all know by now that I AM GOING TO QUILTCON!!!

This is probably one of the most exciting things I have ever done (is that a bit sad?!) and I am on my way to Austin TOMORROW!!

I have a lot of workshops booked and have to take a large amount of fabric and supplies so I decided to make a couple of bags to help with transportation and organisation.


This coincided with the new Cori Dantini fabric arriving at the shop, which is just perfect for this project. The Makers is all about, sewing, embroidering and knitting as well as gorgeous prints, and is the latest line from Blend Fabrics by one of my favourite fabric designers.

First I made this large Workshop Bag. In a free and easy manner I cut up strips and used these to frame the beautiful panels. I made 2 bag front and quilted them with a daigonal grid. Plus I made that nifty inset zip pocket for cutters and scissors.


I made the bag big enough to take an 18 x 24 inch cutting mat, it sits snuggly against one side with a strap that buttons on the outside to hold it (and big square rulers) in place. Long rulers can sit at the bottom for extra stability.


Then you can fill up the bag with your fabric! It's lined with one of Cori's fabrics from Hello World.

I then made a tote bag for carrying around when I am not attending workshops, and for keeping purse, phone, magazines etc in.


On one side are more of the crafty lady panels, and the other side is made from an old pair of jeans. Why denim, I hear you ask? Well I will be partaking in the QuiltCon Pin Swap which means I will be obtaining a lot of pins (or badges as we like to call them in the UK) and somehow denim seems to me the most appropriate material to display these on!


Inside the bag is a little pocket for my new business cards and a special 'pin pocket' so that I always have a pin ready for swapping at all times!


I took me a while to work out what the 'pin swap' was all about. When I eventually cottoned on to the fact that folks were having their own badges printed to swap at the event I knew I had to join in!

So I ordered 200 myBearpaw badges!! It just sounds like such a great way to meet as many new quilty friends as possible. So when I get back I hope to show you a totally full up denim bag side!


Here are my new business cards - myBearpaw one side and the Stitch Gathering the other.


And last but not least a matching lanyard for my official QuiltCon badge! I've just remembered that you are supposed to display a badge on your lanyard so folks know you are part of the pin swap! Better go and do that!


If you like the look of my QuiltCon accessories then you can make your own 'Makers' bags!
We have 10 designs in the new line for sale in our Edinburgh store and on our website (fat quarters and yardage) plus this FQ or F1/8th bundle. Check them out here.


So I will see you on the other side with tales of my trip to Austin, unless you are going to QuiltCon too in which case I will see you there!!!!

Thursday, 11 December 2014

Snappy Pickledish


I signed up for the IGminiswap during an evening of social media frenzy and mass hysteria (you know how it is), and at the time the shipping date seemed SSSOOOOO far away.
But of course it comes around...


So very last minute I started this just 2 days before I needed to ship.

I knew exactly what I was going to do as I was planning this for a new workshop in 2015. Of course I didn't know that I would actually be able to do it until I tried!


I've always loved the Pickle Dish block and it's been on my to do list for a long time. But it's also very fiddly to do the traditional way and I am really into improv stuff at the moment.


So I decided to try it using the same techniques as I'd used for the Freehand New York Beauty at my Stitch Gathering class.


And it worked!
I love the wonky random look (I know it doesn't do it for everyone).
When I look at these 'pickledishes' they look like monster mouths, open and snapping, as seen from above (can you see it?), hence the name I've given this mini. Someone else said they look like venus fly traps which I think is an even better description (and I may steal it for a future quilt!).


This class still has places available (unlike a lot of next term's workshops). So if you'd like to try out this technique and really increase your improv and curved piecing skills then I'd love to have you along on Sunday 1st February!

I tried really hard with my FMQ (my partner has terrifyingly good FMQ skills!) and found I could do tiny feathers as easily as big ones, in fact I think it is easier to FMQ small motifs.


I'm actually in love with this mini and, as usual with these swaps, it was hard to send it off.
But I made the shipping date! I'm still waiting to hear that this mini got to my partner safely and to receive mine.
Meanwhile I have signed up for another swap! the UKminiswap has a shipping date in April - that's AAAAGES away right??!!

Monday, 29 September 2014

Giveaway results and lovely gifts for me!


First of all let's get those results out the way! The winner of the Stitch Gathering Goody Bag is number 86!
Congratulations Gill!! I will email you privately to get your address :)


Commiserations to everyone else, but to make up for your loss let's look at some pretty things.

I wanted to highlight the bag made for me in the Stitch Gathering ticket Tote Swap.
This bag was made for my by Nikki who was one of my first students when I started my classes 3 years ago. Nikki signed up for 3 classes straight away 'basic sewing machine skills', 'basic hand sewing', and 'learn to crochet'. In other words she was a complete novice about everything!


But Nikki was a natural and was very soon making beautiful quilts and so much more.
I love how personal she made this bag for me. She's transformed the SG logo above (by very cleverly shrinking and printing it!) into a version of our myBearpaw logo, but with extra elements from one of my embroideries in the centre.


The last class Nikki took with me was Dresden Plate and you can see how well she did by this beautiful mini Dresden which frames some lovely vintage linen. Nikki knows I love vintage embroidery, she was one of my best customers when I used to make Vintage Linen Notebook Covers and sell them in the shop a few years back.


And then there's the beautiful embroidery on the back with those lovely words which I like to think Nikki was aiming at me :)
I am so delighted with this bag as I know how much work and thought Nikki put in to it, and I am also a very proud teacher.


And then I received another wonderful handmade gift from one of my students!
Elaine took Sheila's Mega Pinnie class at the Stitch Gathering and obviously loved making them so much that she made one for me! And one for my colleague Barbara who was a helper on the day!!


Did you see how amazing the wrapping was? And she used Essex Yarn-dyed and then stitched over it to get that checkered effect - genius!!
I absolutely love the fabric she used and the super cute flower pincushion on the top.


This totally made my day when Elaine gave it to me at a crochet workshop yesterday.
Thank you Elaine! I LOVE being a teacher!!!