Who wants to try some nice gentle improv??!!
Hopefully you're all shouting "me, me, me!" with your hands in the air!
Regular readers will know all about the
Stitch Gathering retreat that I organise every year in Edinburgh and the fabric ticket project that goes along with it. Over the last three years we have sent out a fabric ticket to embellish, a blank tote bag to embellish and swap, and a blank piece of fabric (plus badge) to create a favourite word with.
This year my husband and partner, Jonathan, designed (under close supervision) this Stitch Gathering text fabric (printed by Spoonflower). We sent all our SG attendees a piece of this and instructions to make
their 'Dream House' into a patchwork block using the fabric, and bring it along to the event to be displayed. At the end of the day we will be inviting kind people to take blocks away to make into quilts for Siblings Together.
So with this in mind I thought it might be helpful to post a tutorial for making an improv house block.
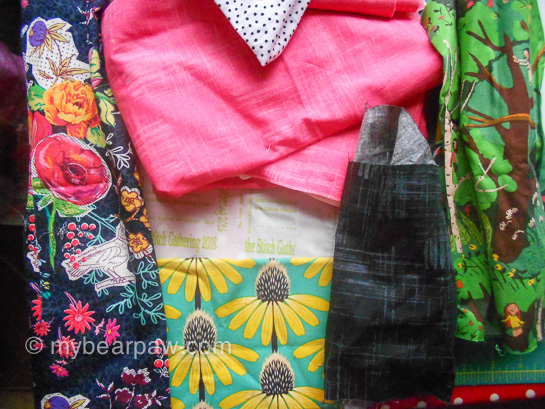
This is improv so I won't be giving you a cutting list, but you should begin by planning your fabrics.
Think about what you would like to use for the house (I am using the Stitch Gathering fabric), the background, foreground, roof, windows, door and even chimney. Try to get a good contrast between different areas.
Now make a rough sketch of the house you would like to create. This is going to be a simple house with two windows and a door. I have made
a whole quilt out of an even simpler house (more of a shed really) and have made much more complicated houses with a 3D perspective and extra stories, so be as cautious or ambitious as you like!
You can see how I have used broken lines to make strips in the drawing above, this is how we will be constructing the block.
Now because this is improv I am going to try and encourage you to put your rulers to one side for now and try cutting freehand with your cutter. This may seem daunting at first but like anything the more you do the easier it will get. Try to relax and enjoy 'playing' with your fabric.
Let's start by cutting our background strips. The first strip I cut will be the top bit of sky and I've cut this at roughly 1.5 inches wide x 13-14 inches. This block will end up as 12.5 inches square so allow a little more so you have spare for trimming.
At the same time I've cut a wider strip for the roof and pieces to go either side of the house. You could leave cutting these extra strips until you need them if you like.
Cut a small rectangle for your chimney. Cut your first strip in half or perhaps a third/two thirds and sew your chimney in between.
Cut a strip for your roof, it should be roughly the same width as your second background strip. Cut this background strip in half and put one half either side of the roof. Overlap your roof a few inches with one of the background pieces as above.
Now get out your ruler (you will need it sometimes but only when I say so!) and place it diagonally so that it runs from corner to corner of the overlapping fabric. Cut through both layers.
Discard the two spare triangles. Repeat with the other side of the roof strips as a mirror image. Sew the two background pieces either side of the roof along the matching angles.
Now you can use your ruler again to trim both of your finished strips before sewing them together.
Let's move on to the house now and we'll start with the windows. It's fun to fussy cut the windows from fabric with figures. I'm using this Tiger Lily fabric by Heather Ross. The little girls are of course climbing trees but I'm hoping it will look like they've got fantastic woodland-inspired murals on their bedroom walls (and really I don't need to think too deeply about this - it's just a patchwork house!).
I've cut rough squares for windows and have cut strips to go between and either side, and long thin strips to go at the top and bottom from the SG fabric.
Sandwich your windows between the house fabric strips. At this point check to see how wide your house strip is - is it wider than your roof (like mine - oops!)?
If so 'take it in' a bit. One of my windows is a bit wider than the other so I have sewn some new seams (and then trimmed away the excess seam, rather than unpicking) and trimmed the outer strips too.
When you are happy that it will fit under the roof with an overhang you can sew the strips at the top and the bottom, and start working on the door.
Cut out a rectangle for the door and strips to go either side. Because I want a sloping foreground I have cut my strips accordingly (so as not to waste fabric one side and to have enough the other). I have had to piece together some of the house fabric as supplies were a bit short!
Once you've sandwiched your door and sewn the two storeys of your house together you can get your ruler back out and trim the sides. Now find those background strips you cut at the beginning (they're probably on the floor by now), or you might just be cutting them for the first time now. Remember they will need to 'slope' just like the bottom of your house.
Sew them either side then use your ruler to trim the top. Sew your roof on to your house.
Use your ruler again to cut your angled 'slope' from the bottom of the block.
Put you foreground fabric underneath your block, positioning it at the bottom of your block (make sure you leave enough to make the block the right size) and trim along the slope line.
Sew your foreground on to the house.
Before we finish - do you like my rotary cutter? It is an ergonomic cutter from Fiskars and I love it. It has 4 different positions and is much better for your wrist, doesn't take so much effort, and actually doesn't cost much more than the usual versions. Edinburgh peeps can buy them from my shop!
Lastly trim your whole block down to the required size. I like to use my 12.5 inch square ruler for this and just cut all around the outside edge.
And there we go - a wonky, improv house block of your own creation! I hope that wasn't too scary but was instead freeing and fun.
If you want a little more house block inspiration check out
this blog post about another quilt made out of house blocks from 2011!
Or if you are relatively local to my studio then why not come along to
my next House Quilt workshop in August?
And if this whole improv thing is not for you then there are a lot of house block patterns available on the internet, just search 'house block patterns'. Or feel free to share your favourite pattern or tutorial here!
I hope you enjoyed this tutorial. Happy house building!